Friday, October 31, 2014

~ Forest Fairy Hoodie Cape ~


Are you ready for some fun!
 ~ ♥ ~


Ok first of all, I will not give you an exact pattern. I will just walk you with some photos and you will use your imagination for the rest of your creation ^:^
This way it more fun and you will find many new tricks by your own.

Let´s start it!
You see the cape part is the combination of Chevon stitch technique and simple shell stitches.

Chevon stitch


The diagram above I found it on internet.

Measure the size you wish to create your capelet. I love to have my capelet overlap.
Start with the shell stitches until you get to the length you desire, then start the Chevon stitch.

 Another way is that start from here and go down to the shell stitches, then the chevon stitch.
But as I mention in another post about this piece that I do not know from the beginning what I would be create, that´s why I attached this part later.


And now is time for the use of the Granny Square

 Joining your Granny Squares together. I use 6 squares x 2 rolls = 12 squares.

 Then crochet your hoodie front part. This one was 60"cm x 35"cm (about)

 Joining them together.

 As you can see, the bottom left side is shorter than the squares, that´s why I need to add some rounds to meet with the squares. You see, there is no rule for it. Just play with it, nothing wrong to have this kind of crazy look, at least for my personal like! It gives the piece looks so raw and unique!
Don´t forget to join the back part of the hood.

 Joining time again.. Any joining technique will work!

Add some buttons for closure and then you are good to go!


Hope you enjoy my instruction and if you have any question just ask.
I used Lana Grossa and Mclana Jazz for this project.

Show off your work by sending me the photos of your creation to myway.maygreen@gmail.com
If you make this for sell, please give me a little credit as your inspiration and that is good enough for me.
Everything here is for FREE and will always be, but if you wish to donate, you can find the button on the sidebar.
 *********
Happy Crochet
~ ♥ ~


Tuesday, October 28, 2014

~ Behind the scene of Autumn Shine ~


Ready for the Woodland journey!
~ ♥ ~


I wish I could share you all the steps of making this piece into live.
Anyway, I will do my best to give you an instruction.

I actually start from the orange part, do you see above photo that have 2 buttons on it. I start it from there. The approximate length of that part is about 130"cm (actually more complicated than that, I just try to give you a simple way) this measurement is measured to be overlap of my shoulder.
 I work hdc, only in the back loops.
The width part you can decide depends on what you like, I combined it with the scarf that I had made a week before Sweet Raspberry
I removed the wooden buttons and crochet them together into one piece.
You can see from the photo below.

Then I have an idea to attach the Granny Square, so I did!


As you can see in the photo above that the shoulder part is overlap.
And now time for the hoodie part!

 I love hdc stitches, don´t know why.
So I made the hoodie part with hdc and again only in the back loops, as I love the texture that gives.
I added some Granny Squares in the hoodie part as well.


now the hoodie part is done!!!


and I crocheted both parts together.


I also crocheted the trim with
ch2 (count as 1hdc), in the same ch st 2dc,1trc,ch1,1trc,2dch,1hdc
The stitches above created a little shell movement you are seeing around the trim.
Continue across till the end and Tadaa!!!!
You are DONE!

 Oh, I have also added these wooden buttons for the closures.


and not to forget, the leaves ^:^
And yeah pretty much it!


Hope you enjoy making yourself a Pixie Hoodie Capelet.

Show off your work by sending me the photos of your creation to myway.maygreen@gmail.com
If you make this for sell, please give me a little credit as your inspiration and that is good enough for me.
Everything here is for FREE and will always be, but if you wish to donate, you can find the button on the sidebar.
 *********
Happy Crochet
~ ♥ ~

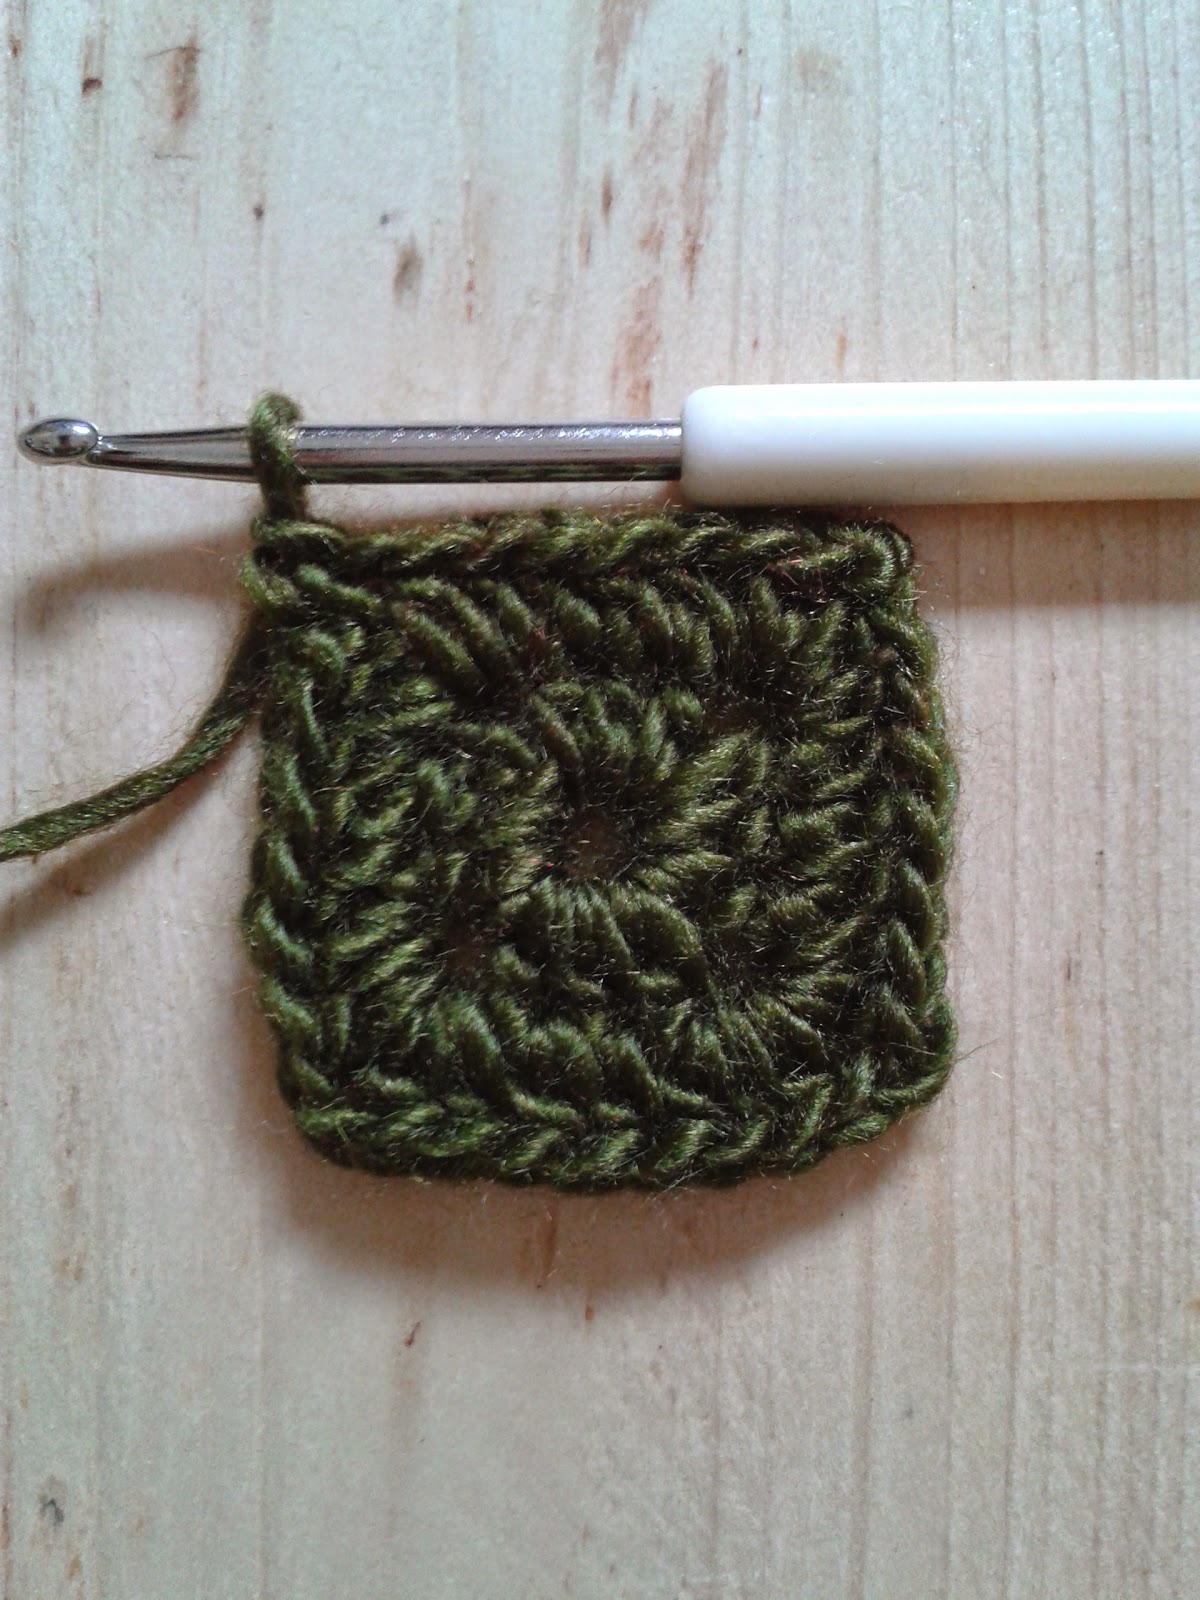
~ Granny Square ~


I love Solid Granny Square!
~ ♥ ~


I love hdc stitch, so I made my Granny Squares with hdc st
start: ch5, sl st in with the first ch st you created to form the ring.
R1: ch2 (count as 1hdc),2hdc in the ring, ch2,
2hdc in the ring, ch2, 2hdc in the ring, ch2, 2hdc in the ring,
ch1, sc in the first ch st (***You have created 4 corners***)
R2: ch2, hdc in the space under (from the previous round),
1hdc in each ch st x3, 2hdc in the corner space,
ch2, 2hdc in the same corner space, continue across the round
R3: ch2, hdc in the space under (from the previous round),
1hdc in each ch st x7, 2hdc in the corner space,
ch2, 2hdc in the same corner space, continue across the round
R4: ch2, hdc in the space under (from the previous round),
1hdc in each ch st x11, 2hdc in the corner space,
ch2, 2hdc in the same corner space, continue across the round
 
R5: ch2, hdc in the space under (from the previous round),
1hdc in each ch st x15, 2hdc in the corner space,
ch2, 2hdc in the same corner space, continue across the round
If you find my way is confusing, you can also check this video from Crochet Greek she is awesome!

Want to know what I have done with these Squares

I hope you will find the use of your Granny Squares!
Show off your work by sending me the photos of your creation to myway.maygreen@gmail.com
If you make this for sell, please give me a little credit as your inspiration and that is good enough for me.
Everything here is for FREE and will always be, but if you wish to donate, you can find the button on the sidebar.
 *********
Happy Crochet
~ ♥ ~